Troubleshooting
We did our best, and you still ended up here. Alas! We’re here to help.
Bowtie Controller
For managed support, we suggest relying on either Chat Support or Assisted Support (SoS) for assistance from Bowtie representatives. You may use Controller SoS as a fallback if the Controller web frontend is inoperative. For self-directed support diagnosis, reference the sections that follow (for DNS/TLS, Monitoring, and Kubernetes Help).
Chat Support
Chat-based support is available for users with Enterprise-level support. If your control plane’s Licensing page indicates a support tier other than “Enterprise”, reach out to a Bowtie representative if you would like to add Enterprise support to your license. See Enabling Chat Support for how to use this feature.
Chat-based support interactions are facilitated by Intercom and contingent upon:
Your deployment granted Enterprise level support
At least one support domain defined and validated by Bowtie
The initiating user’s control plane email address matching one of your trusted support domains
If all of these criteria are met, you may initiate a chat support session with a member of Bowtie staff after Enabling Chat Support by either:
Navigating to the dedicated Controller Chat Support page to begin a new session, or
Use the control plane support option to load the support widget on all control plane pages
In either case, an in-browser widget will appear on the lower-right of the browser window which you may click on to expand and use to start a new chat with a member of Bowtie support or see existing cases.
Enabling Chat Support
To successfully enable Chat Support, follow these steps:
Choose one more or domains in your organization that you trust any control plane Users with configured email addresses to initiate chat support sessions with Bowtie. This mandatory step ensures that only your deployment has the ability to open new and existing support cases under the indicated domain names.
Enter these domains under your support domains. After clicking Save, they will be sent to Bowtie for approval.
Consult with your Bowtie representative about your granted support tier and claimed support domains. Bowtie must enable Enterprise level support for your license and confirm that you have ownership of any configured support domains and make the changes to your license before you can retrieve a trusted license with these required fields.
After your license has been granted Enterprise-level support and any support domains trusted against your deployment, the next automatic or manual license synchronization (through the Licensing page) will fetch and store your updated license. Any users with email domains listed in trusted support domains may initiate a new chat session.
Controller SoS
Controller SoS provides the capability to instruct a Controller to aggregate a diagnostics bundle and deliver it to Bowtie support for assisted troubleshooting. The methods described in this section provide a route into diagnostic capabilities without any assumption that the Control Plane Interface is functional to ensure that support diagnostics can be generated independently. If the Control Plane Interface is non-functional, you should proceed to follow this section for assisted support.
To get started quickly, follow the steps for your situation - collecting diagnostic bundles from the command line skips Controller ownership validation, so proceed with the first bullet point if you have console access to the host.
Run the
soscommand.If you do not have console access to the Controller or are otherwise unable to run the
soscommand, browse to/sosunder the IP address or domain that your Controller is hosted under. If a browser is unavailable, you may issue a request to your Controller’s HTTPS endpoint under the/sospath with a tool likecurl. If your Controller’s HTTPS endpoint is non-functional, you may alternatively use port911which bypasses the proxy layer. The responses from this endpoint will explain how to proceed.
At some point following either of these two steps, a representative from Bowtie will need to trust your upload request, so you should be in communication with a Bowtie representative in preparation for that step.
Read on if you would like to change parameters like valid collection windows or bundle expiration - by default, after validation, bundle generation is permitted once within the next 24 hours before requiring re-validation and will be auto-deleted by Bowtie in 30 days.
The remainder of this section explains SoS functionality in greater detail for additional customization options and capabilities. Authorization flow explains how the permissions model operates, and Controller SoS API explains the API and available options.
SoS Serial Console
To reliably invoke the capabilities provided by Controller SoS over its REST API, read access to the Controller’s serial console is necessary. On some platforms this may require running the Controller on certain instance types or configurations. For example, EC2 serial console access requires an instance running on instance types that support the AWS Nitro System.
Controller SoS API
The SoS API (either via /sos or requests issued to port 911) consists of the following endpoints.
Note that the /sos path requires authentication.
/GETWill return the next steps to proceed with SoS bundle collection whether initiated from the command line or a browser. The root path accepts the following headers if they are given:
Authorization: Bearer <token>: If set and the token is valid, the Controller will defer any time or use limits to generate a support bundle without re-validation.
The following
GETparameters are accepted:expiration: Accepts an ISO 8601 formatted date/time string to control when support bundles will be deleted by Bowtie. By default, this value is 30 days. For example, to request that a support bundle undergo deletion one week from time of submission, you may generate a timestamp using the command:date --utc -Is --date '1 week'and URL-encode the resulting value to set with?expiration=<value>.test: When set to1, will perform a test bundle collection without sending data to Bowtie.stream: When set totruewill initiate bundle collection and stream responses back.email: When set, the support bundle will associate the given user email to help Bowtie support staff engage with the submitter. This field is optional.note: When set to a base64-encoded string, the submission endpoint will store this field as a free-form description of the reason the support bundle was submitted. This field is optional.
POSTUsed to initiate support bundle collection from the command line with a command like
curl --location --no-buffer --data '' {endpoint}. Will redirect to theGETendpoint with appropriate headers set for streaming responses.All of the parameters accepted by the
GETendpoint are accepted here and will be forwarded to theGETendpoint. Thenotefield accepts a user-readable string instead of a base64-encoded string to facilitate easier submission when usingcurl.
/validate[?<optional parameters>]GETThis will issue a challenge in the form of a time-limited nonce on the Controller’s serial console.
In a browser, this page will present a form to enter the limited-use nonce to proceed with the remaining steps.
Via the command line, the plaintext response will direct the client to the
POSTvalidation endpoint with an example command to validate ownership from the command line.
POSTWhen passed a valid authentication nonce in
POSTform-data under thenoncekey, the Controller will permit diagnostics bundle collection and delivery for a limited duration or limited number of times, constrained by whichever is reached first. It accepts the following query string arguments:limit_uses(Default:1): restrict the/sosendpoint’s ability to generate and deliver support bundles by the given number of times. After this limit is reached, the Controller we require re-validation of ownership over the serial console.limit_minutes(Default:1440): restrict the/sosendpoint’s ability to generate and deliver support bundles within the given minute(s) limit. After this limit is reached, the Controller we require re-validation of ownership over the serial console.include_secret(Default:0): If set (to a truthy value like1ortrue), the endpoint will return the trusted secret in the response body. We recommend to not set this parameter if using a non-HTTPS port, for example, if using port911over an untrusted network.
If validation responses include a trusted secret with the use of
include_secret, you may send it in subsequent requests to the root SoS endpoint to reliably generate support bundles without adhering to the time and usage-based limits.
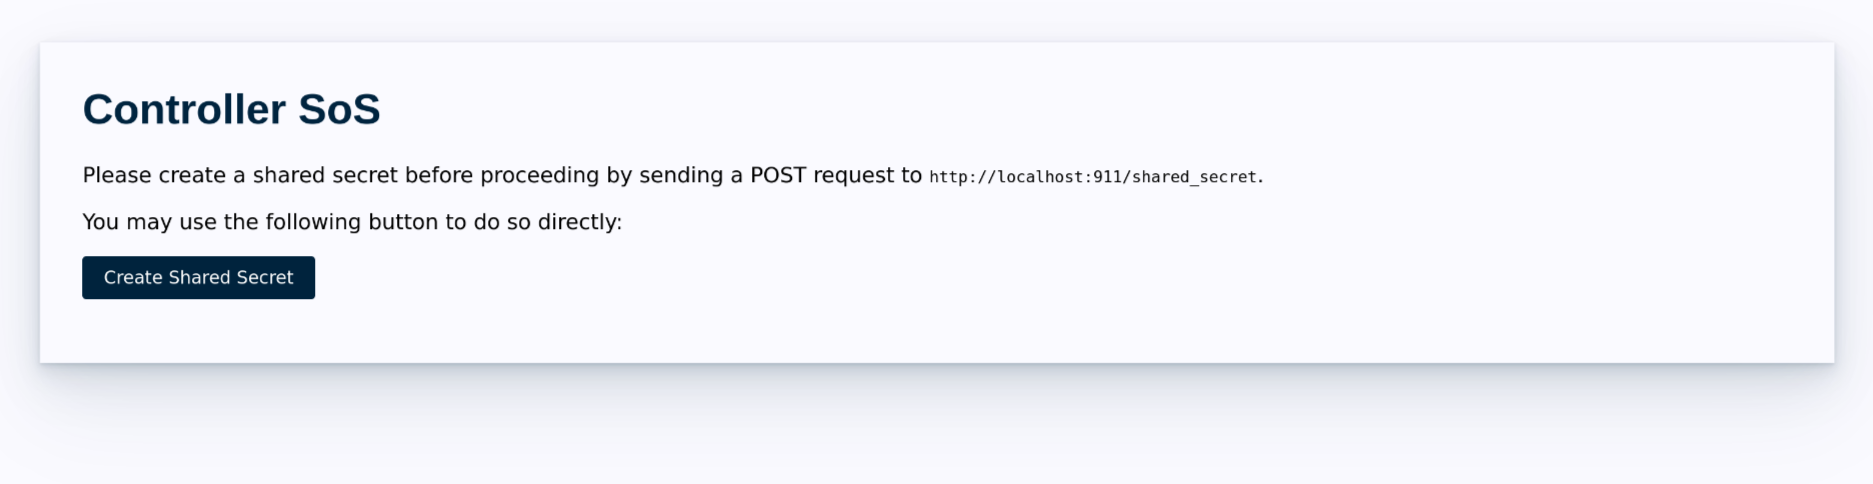
/shared_secretPOSTWhen properly authenticated or validated via the serial console method, will generate a new shared secret if one does not exist.
Note that, if you have command-line access to the Controller in question, you may elect to validate ownership of the Controller using the sos validate command.
Controller /sos Access
To avoid abuse from the public Internet, the /sos endpoint requires a logged-in user session.
You may either use the endpoint after logging in to the Control Plane Interface or authenticate against the Controller REST API and use a session cookie with a tool like curl.
For example, the following sequence of commands logs in to a Controller at the endpoint https://bowtie.example.com with the username admin@example.com and password deadbeefcoffee:
Capturing Authentication Cookies
We use the tool httpie here to simplify capturing authentication cookies, but the curl command also supports the --cookie and --cookie-jar flags.
http --session=bowtie https://bowtie.example.com/-net/api/v0/user/login \
     email=admin@example.com \
     password=deadbeefcoffee
After this command, you may issue authenticated requests to the Controller with the saved session cookie.
http --session=bowtie https://bowtie.example.com/-net/api/v0/user/me
Refer to Controller REST API for a complete list of available API endpoints.
If the Controller Bowtie backend is non-functional and unable to authenticate user credentials, you may instead use the endpoint via port 911 which does not enforce a valid user session.
For this reason, we suggest keeping access to port 911 restricted to trusted networks only.
Example SoS Use
Support bundles may be generated via either the command line, browser, or REST API from the command line:
SoS Command Line Example
Invoke the sos command.
If a Bowtie representative has already trusted the shared bundle secret, a diagnostic bundle will be generated and delivered to Bowtie.
When run for the first time or waiting for Bowtie to trust the shared secret, this command will print the shared secret ID to pass along to our support team.
The sos command accepts the validate command to optionally validate ownership of the Controller via the command line if you are using the API-based method.
Consult sos --help for configurable options, including the ability to validate nonces generated via the API method or select additional service logs as part of the diagnostics collection.
SoS Browser Example
Privileges and Capabilities
If you are already logged into your Controller’s Control Plane Interface, the browser-based SoS steps will skip validation and you will be forwarded directly to either create a shared secret or generate a support bundle directly, whichever is necessary first.
If the Control Plane Interface is functional, we suggest using the native Controller SoS instead.
Navigate to the domain name that your Controller is hosted under to
/sos. For example, the endpoint for a Controller running underhttps://controller.example.comwould behttps://controller.example.com/sos. If the proxy layer terminating TLS and matching the domain name is non-functional, use the plain HTTP backup endpoint athttp://controller.example.com:911(potentially by plain IP address if necessary).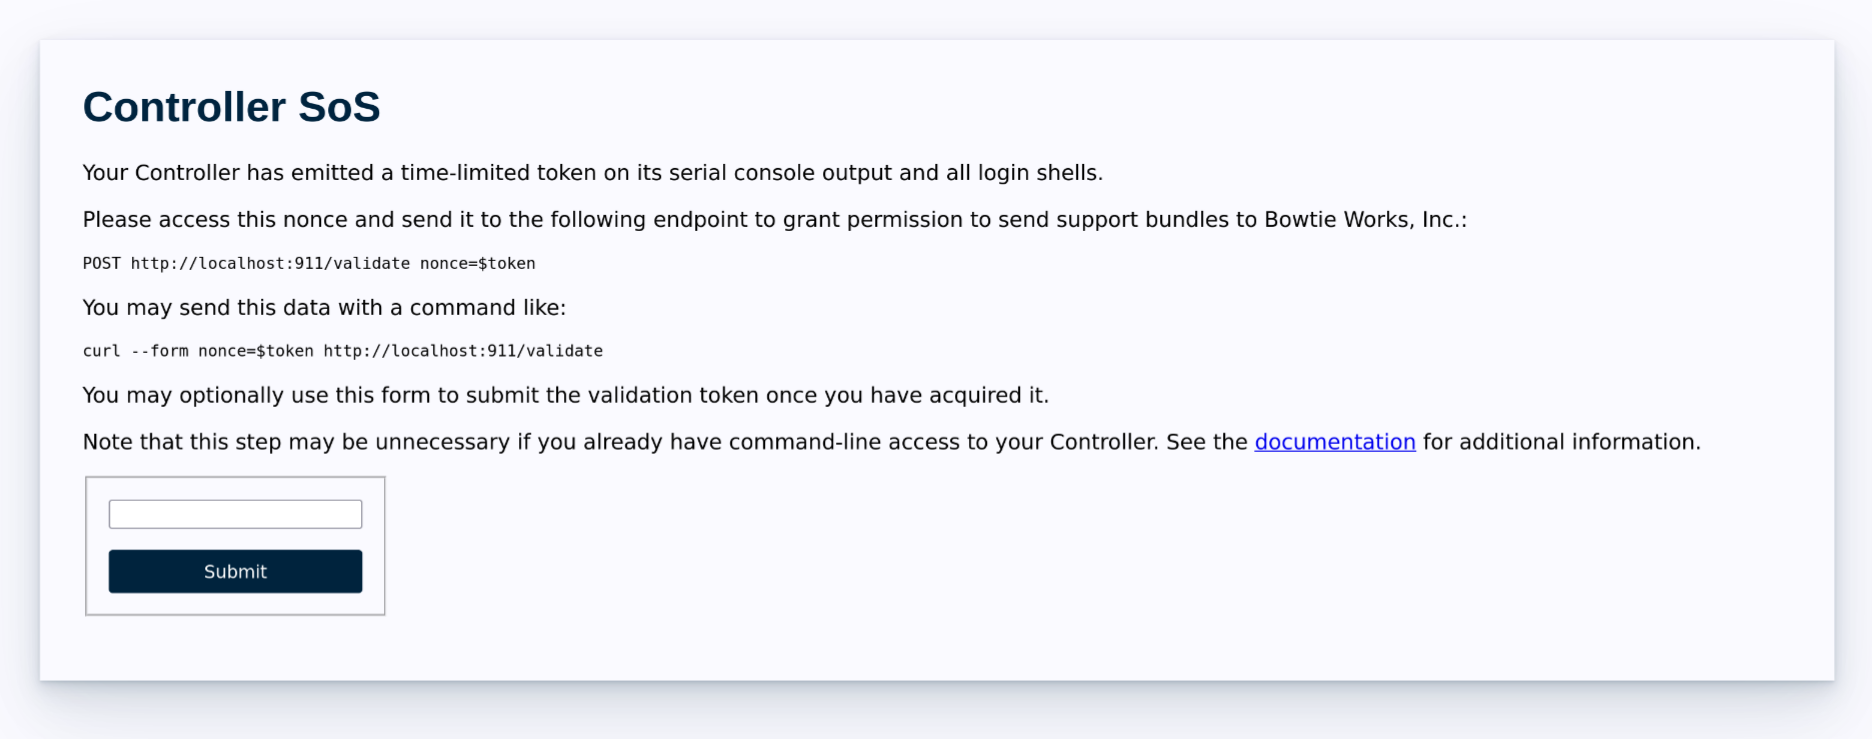
The initial
/sospage will provide the instructions to follow. By default, the page will redirect to the/validateendpoint after generating a time-limited nonce emitted on your Controller’s serial console to prove administrative ownership of the machine.After retrieving the nonce, enter it into the form on the page to affirm ownership of the Controller. A valid nonce will return a success message with a link back to the
/sospage for next steps.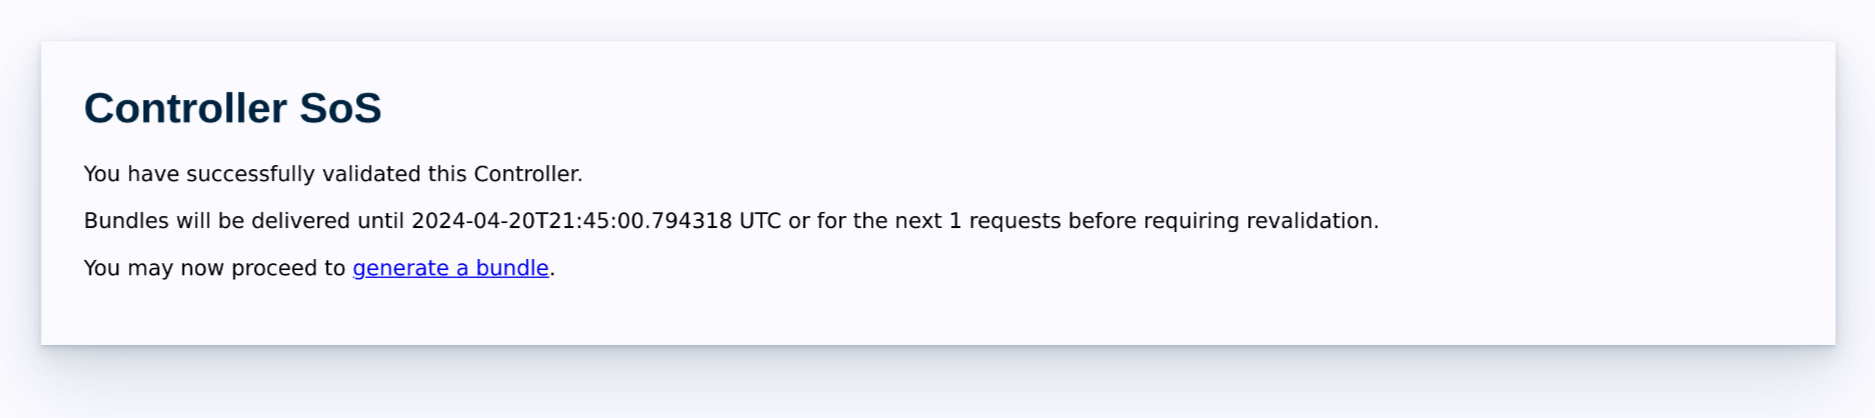
If necessary, the page will prompt you to create a shared secret with Bowtie. Proceed to create the shared secret with the indicated button.
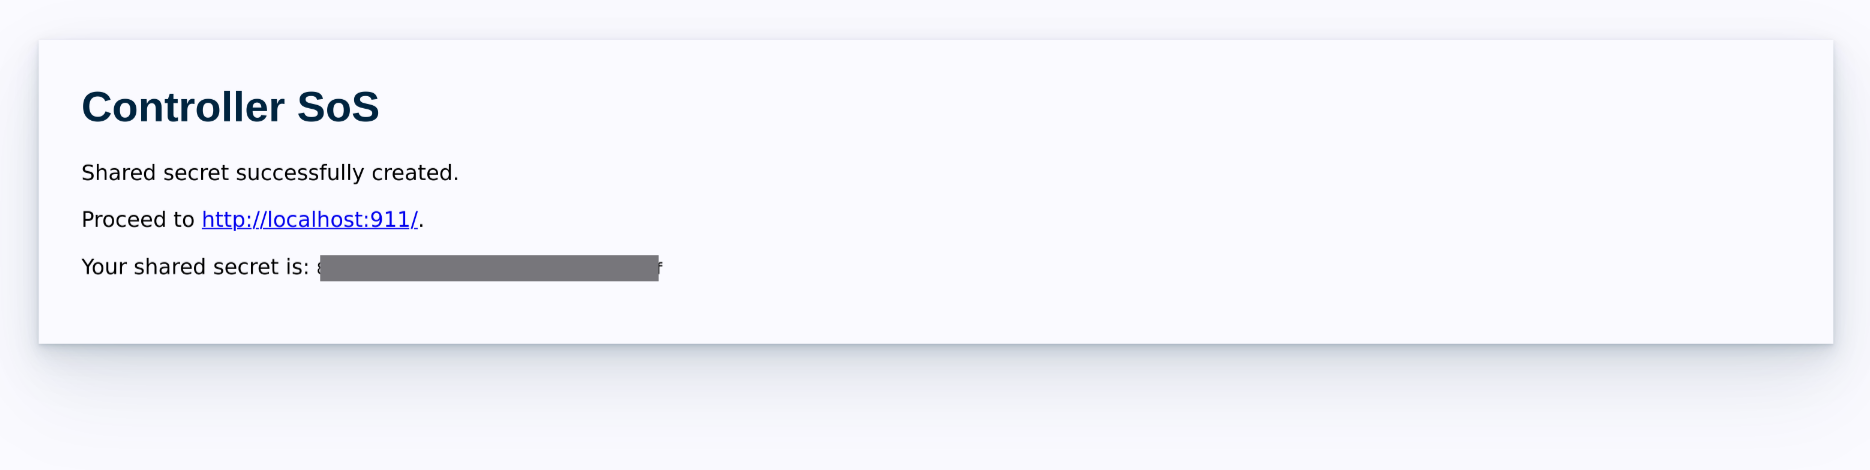
The page will provide a link back to the root page. Make a note of the shared secret ID, which you will need to share with a Bowtie representative. Follow the link to proceed.
The next page will indicate whether the shared secret must first be trusted by Bowtie before initiating support bundle uploads.
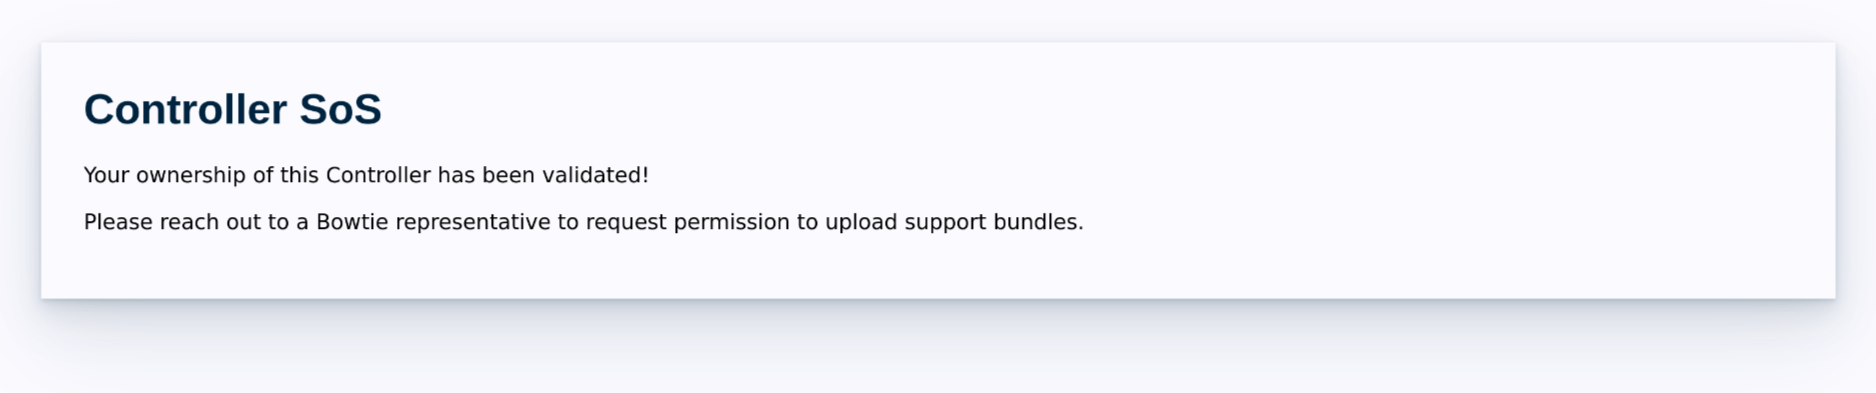
Reach out to a Bowtie representative with your shared secret ID. Bowtie will trust the shared secret to enable your Controller to upload support bundles to our managed platform.
Load the root
/sosafter Bowtie has trusted the shared secret, which should present you with the following page.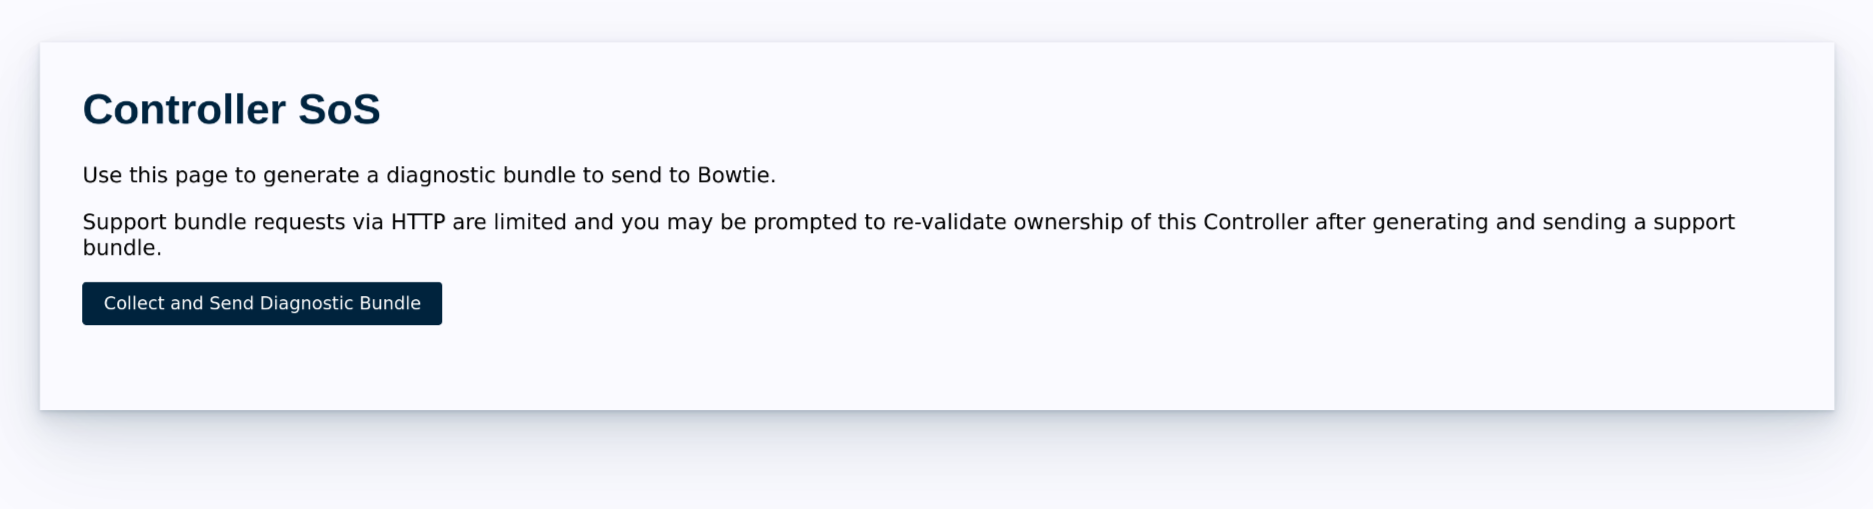
Click the button to generate a support bundle and send it to Bowtie. If re-validation is necessary to gather more support bundles, the page will instruct you with next steps.
The resulting support bundle ID should be shared with Bowtie. Assisted troubleshooting can then begin in tandem with a member of the Bowtie team.
Future diagnostic bundles may be generated without the shared secret step - only validation is necessary when performing the web-based method from this point on.
SoS API Example
Given a Controller with the endpoint https://controller.example.com, the steps to generate and send an SoS support request bundle to Bowtie are:
Open your platform’s serial console page for the Controller. For many on-premise hypervisors, this may be a page listing details for the Controller virtual machine. Most cloud providers list serial console output as a discrete page that you may navigate to and leave open in a browser tab.
Issue an initial request to the Controller’s SoS validation endpoint:
curl https://controller.example.com/sos/validate
API Access
Remember that if you elect to use
/sosrather than port911, API authentication is necessary.Note that you may alternatively direct requests to http://controller.example.com:911 if the TLS-terminating reverse proxy is non-functional, but we suggest using the TLS-enabled endpoint if available to avoid plaintext transmission.
Retrieve the nonce from the Controller’s serial console output.
Issue a validation request to grant the Controller the ability to generate support bundles. If you would like a persistent secret to generate bundles in perpetuity, set
include_secretand note down the printed secret for unrestricted use later if desired.curl --form nonce=$token https://controller.example.com/sos/validate
Alternatively, retrieve the nonce and validate Controller ownership on the command line with the
sos validatecommand.
If you have not yet already created a shared secret, do so now using the
/shared_secretendpoint and note the resulting shared secret ID.curl --data '' https://controller.example.com/sos/shared_secret
Reach out to a Bowtie representative to request permission to upload support bundles to our platform. Share the secret ID to identify your shared secret with our team. This step trusts the shared upload key to prevent abuse of the file upload capabilities of the support bundle API.
Generate a new support bundle and deliver it to Bowtie. This request sets the
--no-buffercurlflag to stream output and the progress of the collection process, which will close the connection once the process completes. Set theexpirationparameter at this step if you would prefer that your uploaded data be deleted within a time frame other than the default 30 days.curl --location --no-buffer --data '' https://controller.example.com/sos
Contact your Bowtie representative with the listed bundle ID to collaborate on diagnostics efforts.
Subsequent requests will either require re-validation or the Authorization header set to the trusted secret.
Alternatively, with command-line access, subsequent calls to the sos command will generate support bundles without these validation steps.
SoS Contents
The SoS diagnostics payload bundle includes a variety of different metrics and pieces of debugging information. The collection script intentionally avoids information that could lead to privileged access or sensitive information disclosure like password hashes, private keys, or personally identifiable information. While the total set of data collected may change with updates and improvements, in general, the data sent to Bowtie will include information like the following:
Service logs, including log output from the Bowtie API server, reverse proxy, Bowtie DNS service, and cloud-init logs.
Wireguard configuration, including device information, peer data, and network addressing information. Public keys are truncated to avoid unintentional disclosure and private keys are never included.
System profile (hardware specifications, current resource usage, hostname, filesystems, and network configuration)
Process tree
Metrics and other daemon instrumentation
A limited set of application database information. The collection script exports a subset of API objects like Controller information, site ranges, and organization configuration. Sensitive collections like user records are not exported.
Note that, as part of the diagnostics process, Bowtie will proactively reach out to your Controller’s public HTTP and HTTPS endpoints to confirm availability to affirm that capabilities like automatic TLS can function.
DNS/TLS
If you’ve encountered problems setting up DNS or TLS, check the following:
Is your controller instance available from any public address?
Have you confirmed Open Port Requirements?
If the application at
/setuppresented you with an error, please contact your Bowtie representative, who can engage with our engineering team to understand the error and provide assistance.
Monitoring
Bowtie Controllers ship with a local, self-hosted observability stack. Reference Observability for complete documentation, including how to export this data via OpenTelemetry for additional visibility within your own infrastructure.
Kubernetes Help
Consider the following steps when debugging a potentially problematic Kubernetes deployment:
UDP Routing
The Bowtie server process negotiates a wireguard connection between each client and thus requires that inbound port 443 UDP traffic be sent to the Bowtie Service object.
The ingress-nginx Ingress Controller supports inbound UDP port routing and the Helm Chart installs a ConfigMap that enables this.
If you are not using ingress-nginx for inbound traffic routing, you may need to consult with your Ingress Controller’s documentation to determine how to properly route UDP traffic to your Bowtie Service.
Bowtie Client
Resetting DNS
The Bowtie Client includes a DNS server updates and your local network configuration to use it. This makes services in your private network accessible, and the local DNS server forwards public queries to your original DNS server (which is typically provided by your Internet service provider). Your original configuration will be restored whenever Bowtie is shut down, but if Bowtie is not shut down cleanly, these settings may not be restored.
You may follow the instructions below to restore your DNS configuration if the Bowtie Client fails to do so (for example, if the Client daemon crashes.)
Shutting down Cleanly
To use the Bowtie Client itself to attempt to restore DNS, restart Bowtie and then shut it down cleanly.
Shutting down on Windows 11
Windows Documentation
This documentation will come soon, but you may reference the MacOS documentation until then, as the processes are similar.
In the meantime, use the Services app to query and disable the service.
Delete Bowtie from \\HKCU\Software\Microsoft\Windows\CurrentVersion\Run to disable the tray applet starting on startup.
Shutting down on MacOS
A helper script is available in /usr/local/bin/bowtie-ctl.
More information about this script may be printed via bowtie-ctl -h.
To shut down and disable the Bowtie client, run sudo bowtie-ctl disable.
Shutting down on Linux with systemd
Restarting and stopping Bowtie cleanly may be done using systemd:
sudo systemctl restart bowtie-service
sudo systemctl restart --user bowtie
sudo systemctl stop bowtie-service
sudo systemctl stop --user bowtie
sudo systemctl disable bowtie-service
sudo systemctl disable --user bowtie
Resetting DNS Manually
Alternately, you may choose to manually restore your DNS settings.
Resetting DNS on Windows
Open Settings.
Click on Network & Internet.
Click the interface used by your Internet. This is usually labeled either “Ethernet” or “Wi-Fi”.
Under the “DNS server assignment” section, click the Edit button.
Select the “Automatic” option using the drop-down menu. Alternately, you can select the “Manual” option and manually enter a DNS server. For example, you may use “8.8.8.8” to use Google’s DNS service or “1.1.1.1” to use Cloudflare’s.
Resetting DNS on MacOS
MacOS Documentation
This documentation will come soon!
Resetting DNS on Linux with systemd
Ensure that the Bowtie Client bowtie-service service is stopped and disabled:
sudo systemctl stop bowtie-service
sudo systemctl disable bowtie-service
sudo systemctl stop --user bowtie
sudo systemctl disable --user bowtie
Then remove the DNS configuration file and restart systemd-resolved:
sudo rm -rf /etc/systemd/resolved/bowtie-*.conf
sudo systemctl restart systemd-resolved
Cannot access the Internet when Bowtie is not running
Follow the steps at Resetting DNS in order to restore DNS settings.
Deleting the Cache
The Bowtie Client maintains a cache of entrypoint values and other network data so that it can continue to work in the event of network issues.
If you are experiencing issues with the Bowtie Client, you may delete this cache to prompt the Bowtie Client to reconfigure itself.
The cache is located at the following filesystem paths:
Windows:
C:\ProgramData\bowtie\cacheMacOS & Linux:
/etc/bowtie/cache
Removing an Entrypoint
Entrypoints are cached, so Bowtie will continue to try and contact all entrypoints even if they have been removed from the configuration file.
To remove an entrypoint, first remove its entry from the Client Configuration, then follow instructions for Deleting the Cache.
Debug Log Information
The amount of log information created by the Bowtie client may be adjusted by passing one or more --verbose or --silent options to the executables or adding the verbose = N or silent = N options to the configuration file.
Windows
Log information for the Bowtie client is saved in C:\ProgramData\Bowtie.
MacOS
Log information for the Bowtie client is saved in /var/log/bowtie.
These log files, along with related system information, may be saved into a compressed file that can assist with remote debugging through sudo bowtie-ctl inspect.
Linux
Log information is printed to standard output and is usually collected by systemd-journald.
It can be inspected with:
sudo journalctl --unit bowtie-service
journalctl --user --unit bowtie