Getting Started
Two distinct types of software must be installed to run Bowtie: the client runs on your laptop or desktop and the controllers runs next to your private resources. After setting up one or more controllers, you may then proceed to installing the clients on your device.
Bowtie Controllers are network appliances that Bowtie provides pre-built images for. You provision a Controller by installing it in your on-premise infrastructure or public cloud presence and then performing a few short setup tasks. A Controller typically operates in an environment like the DMZ security group within EC2 on AWS that permits it to create routes originating from outside your network to inside a private network space. Controllers may be clustered to scale horizontally and achieve a highly-available network control plane. From a web interface, or API, you configure access to private resources, and any number of network Policies that dictate access to members of your network to specific private resources.
Bowtie Client packages may be installed by users as a normal application (for example, as an App on OS X or an .deb on a Linux system). Alternatively, you may setup Client installations using fleet management tools like Active Directory, Salt or JAMF in tandem with the provided Client packages. A Client may take the form of any supported network device, such as an employee laptop running OS X or a Windows desktop machine.
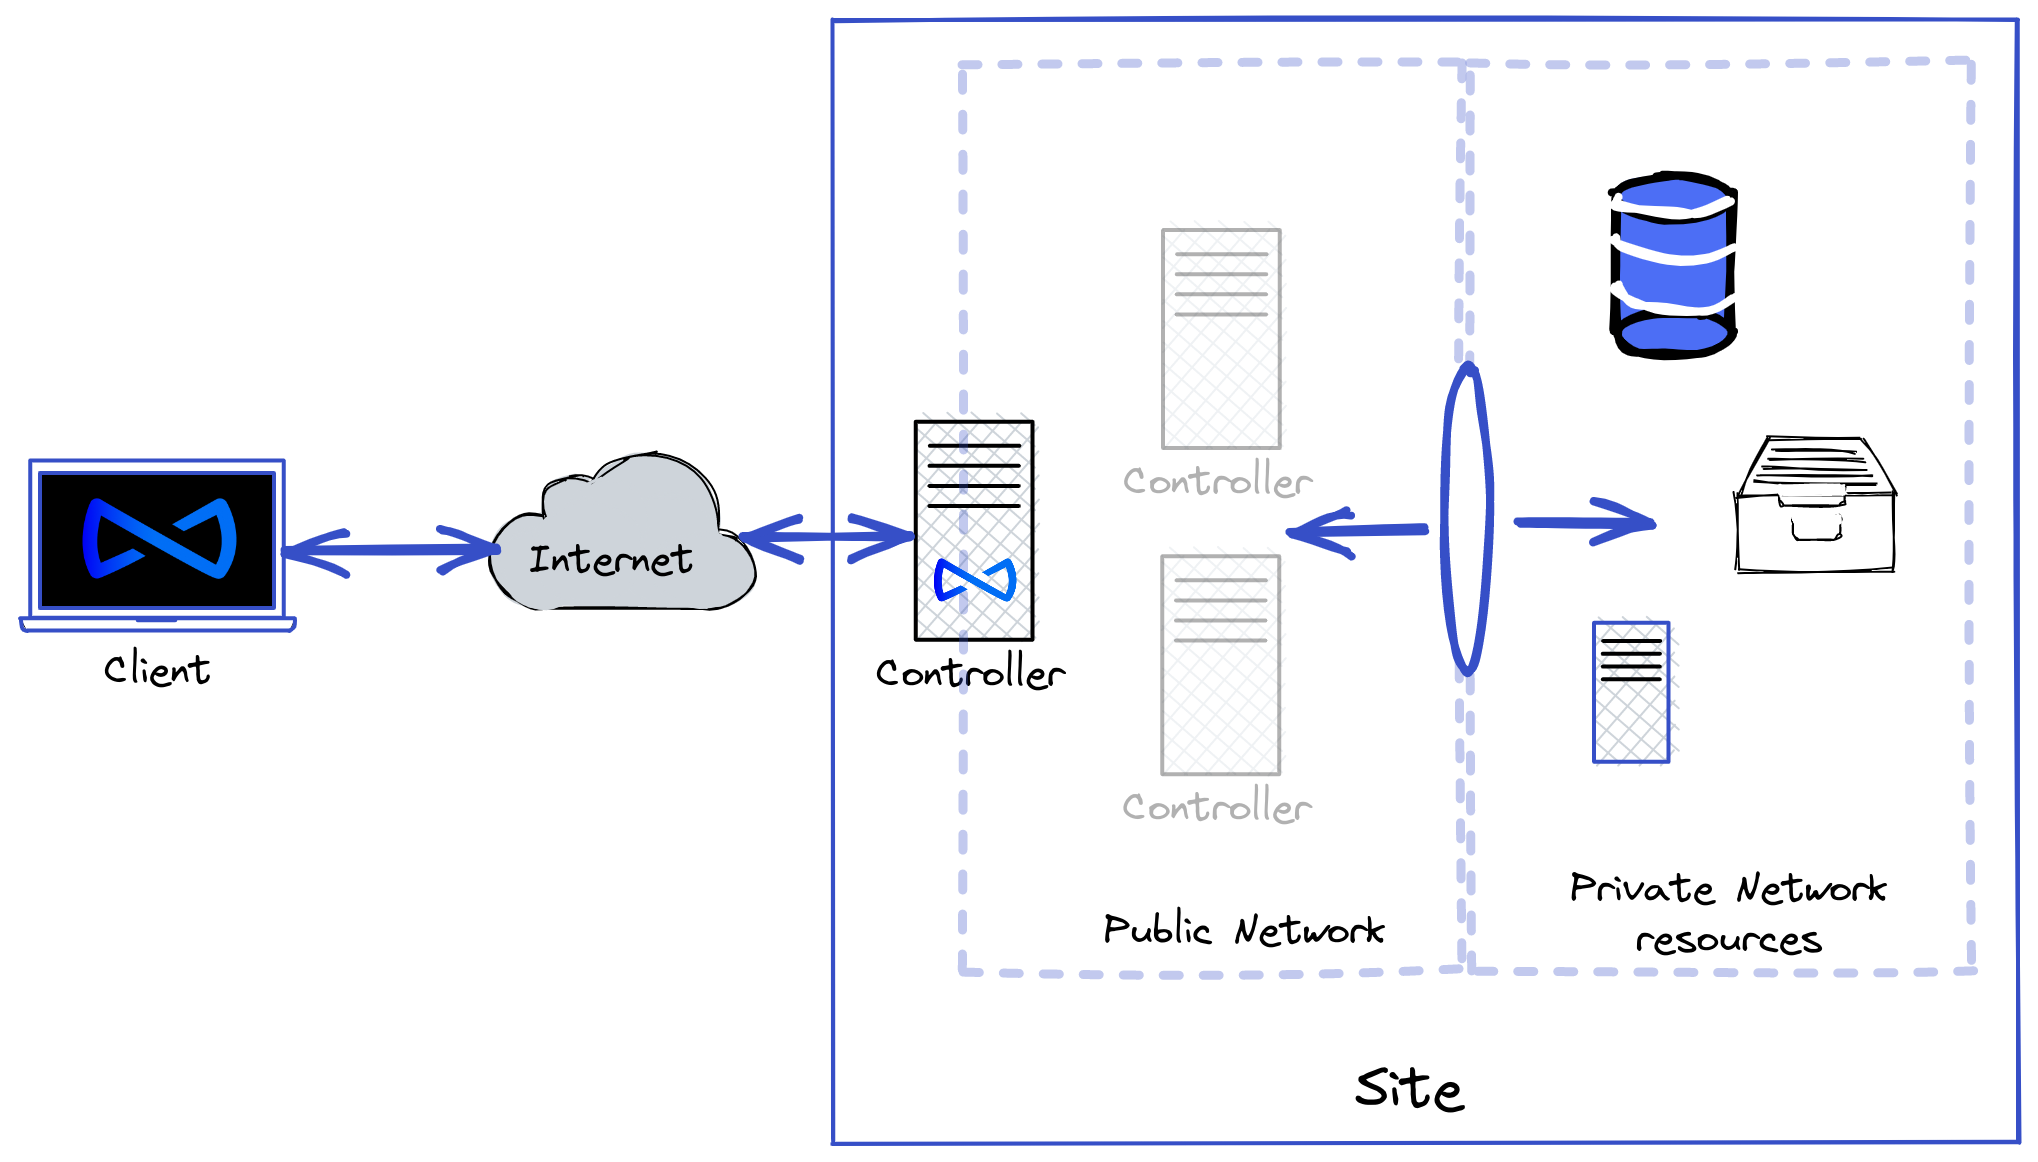
The diagram below illustrates what each of these roles looks like: clients connect to an available controller, which serves as an entry point into other resources in their networks. This diagram shows what this looks like for a single site, which is the term the Bowtie software uses for an organization network, such as a datacenter location:
Complete the following steps before proceeding to Using Bowtie – first, installing one or more Controllers, and then installing the Client on any machines that should be joined to the private Bowtie network.